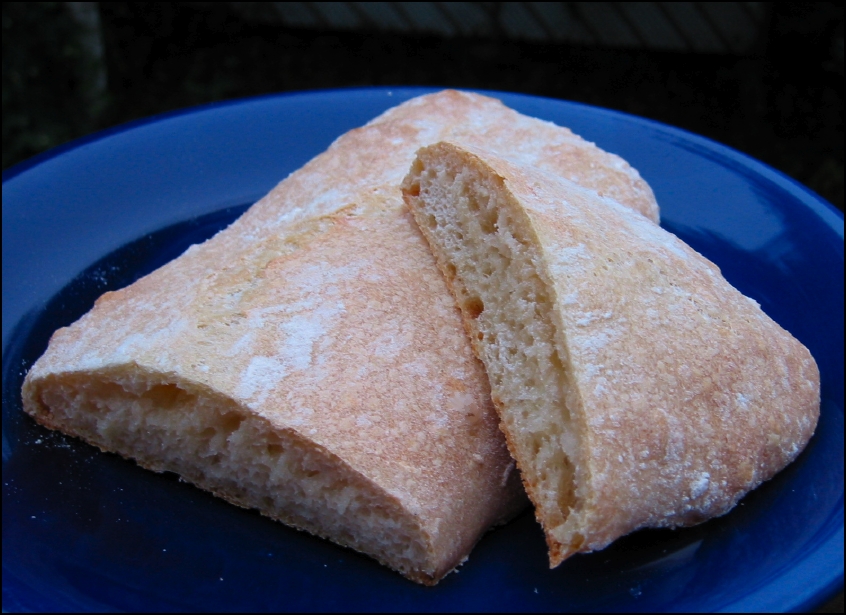
I figured I’d try making ciabatta (ie, Italian slipper bread, as it looks kinda like a man’s slipper) because it’s gotten so trendy in the past few years and there was a recipe in my bread book. The ciabatta process is quite different from other breads. It requires a starter begun the night before and the dough is so wet, it is never actually kneaded. It remains wet and gooey until baking, in fact, but once out of the oven, this was one of the best breads I’ve ever eaten. My roommate and I would have finished both loaves within hours of baking if I hadn’t put my foot down to insist we save some for later.
The important points to keep in mind when making this bread are avoid adding extra flour to the dough and handle it with a very light touch after rising. Extra flour is very tempting because the dough is so hard to work with, but really, don’t do it except for when you need it to shape the loaves. After rising, do not punch down and be very gentle while shaping. Also, you really can’t use too much flour for the shaping process. If you have silicone baking mats (sadly, I do not), this would be a very good time to use them.
Ciabatta
for the starter
- 1/2 tsp dry yeast
- 2/3 cup warm water
- 3 Tbsp soymilk (or the like)
- 1/4 tsp sugar
- 1 cup unbleached flour
for the dough
- 1/2 tsp dry yeast
- 1 cup warm water
- 1/2 Tbsp olive oil
- 2 1/2 cups unbleached flour
- 1 1/2 tsp salt
1. Make the Starter: Sprinkle the yeast into the water and milk in a large bowl. Let sit for 5 minutes, then add the sugar and stir to dissolve. Mix in the flour to form a loose batter. Cover the bowl with a dish towel and let it rise for 12 hours or overnight. I like to do this in the oven.
2. Make the Dough: Sprinkle the yeast into the water in a small bowl. Let sit for 5 minutes, then stir to dissolve. Add along with olive oil to the start and mix well.
3. Mix in the flour and salt to form a wet, sticky dough. Beat steadily with a wooden spoon (be careful here if you live in Attleboro) for 5 minutes — the dough will become springy and start to pull away from the sides of the bowl, but will remain too soft to knead.
4. Cover the dough with a dish towel. Let rise until tripled in size and full of air bubbles, about 3 hours. DO NOT punch down the dough. Generously flour two baking sheets and have ready extra flour to dip yours hands in.
5. Use a dough scraper to divide the dough in half while in the bowl. Scoop half the dough out into one of the heavily floured baking sheets.
6. Use well-floured (do you detect a theme here?) hands to pull and stretch the dough to form a roughly rectangular loaf about 12″ long. Dust the loaf and yours hands again with flour. Neaten and plump up the load by running your fingers down each side and gently tucking under the edges of the dough. This an be challenging — just do your best and don’t overworry it.
7. Repeat the previous step with the other half of the dough. Leave the loaves uncovered to proof for about 20 minutes. The loaves will spreads out as well as rise. Remember, it’s supposed to look like a well-worn slipper.
8. Bake in a preheated oven at 425° for 30 minutes until risen, golden, and hollow-sounding when tapped underneath. Cool on a wire rack, then hide them if you don’t want them eaten immediately.